It's Been a Year!


Today is my one-year anniversary of moving into my new old house.  The pink tree is a magnolia, and the photo was taken right before it was in full bloom, two weeks ago.  Last year, I just missed the tree at its peak.  This year, I didn't miss it, but, sadly, I forgot to take a picture.

It's been a very busy year.  My focus has been on white paint to neutralize some multi-colored walls and de-accentuate the low ceilings, storage space, the bathroom, and the kitchen.  I still have many gallons of white paint to go and some work to do on storage space and the bathroom, and of course lots of decorating to do, but the kitchen is very, very, very close to being done. 

When I bought the house, the kitchen was fully functional, but it just wasn't living up to its potential in terms of best use of the space and design.  It's so much better now.

I think the below before and after comparison is probably the best illustration of the difference:


Here is a view of the island, which I decided to paint blue:


If you look closely, behind and to the right of the island you can see that I still have a sliver of the original trim to paint, and the color of that original trim is almost exactly the same color as the island.  I painted the island before I uncovered the original trim.  I think the house spoke to me and told me that the kitchen should have some blue.  And I'm not even joking about that!

Let's see one more before and after comparison, this time in the corner where I had some cabinets taken out, and I added much more functional and space-saving shelving:


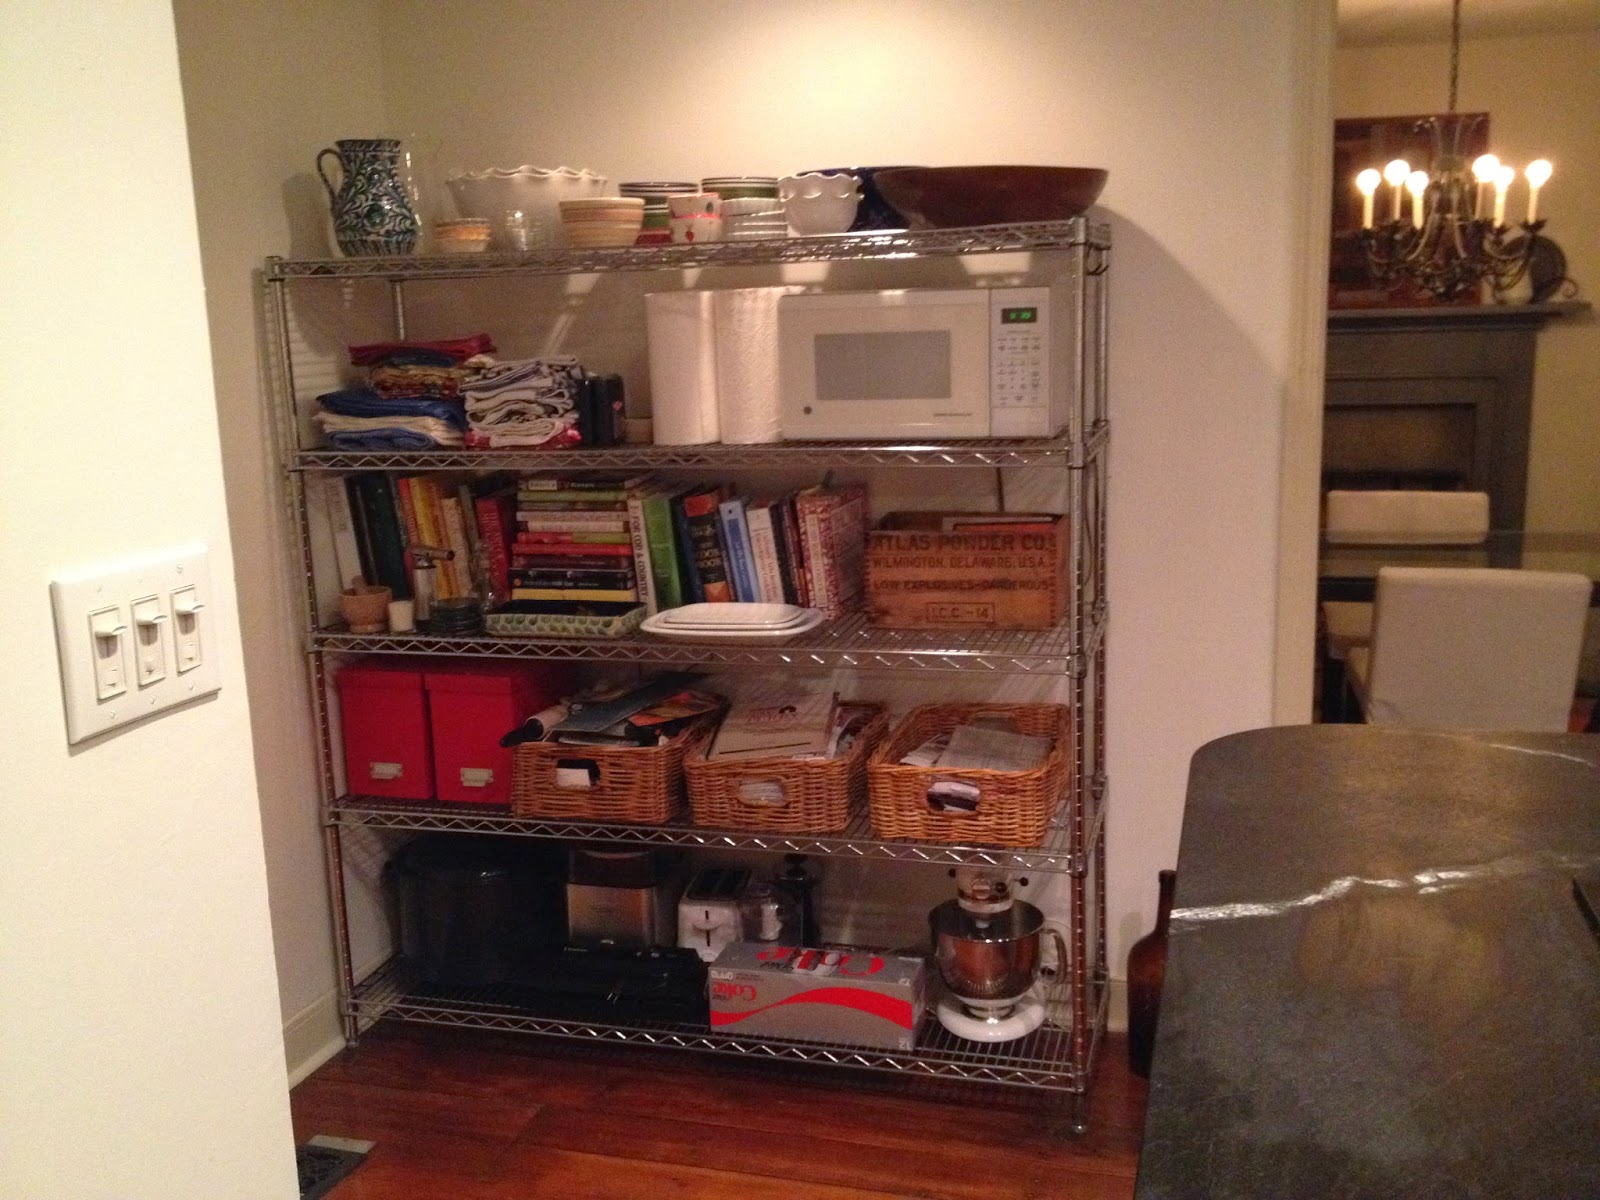
Here is one more after view, of the corner next to the refrigerator, which I'm including so that you can see first, the before paint color (see where I ran out of steam above the doorway?), and second, Fiona's new brother, Atlas.  You also get a bonus sneak peak of the dining room:


I love my pot rack and also the hooks on the door for hanging aprons and other things.  The door in the kitchen is the door that you see on the left of the exterior house photo, and it's not used for entrance to the house, so that area functions as a nice little organized catch-all corner.
 
So far my main accomplishments in the kitchen have been:
  • Contractor moved the kitchen island towards the refrigerator to allow for more counter space and seating at the counter;
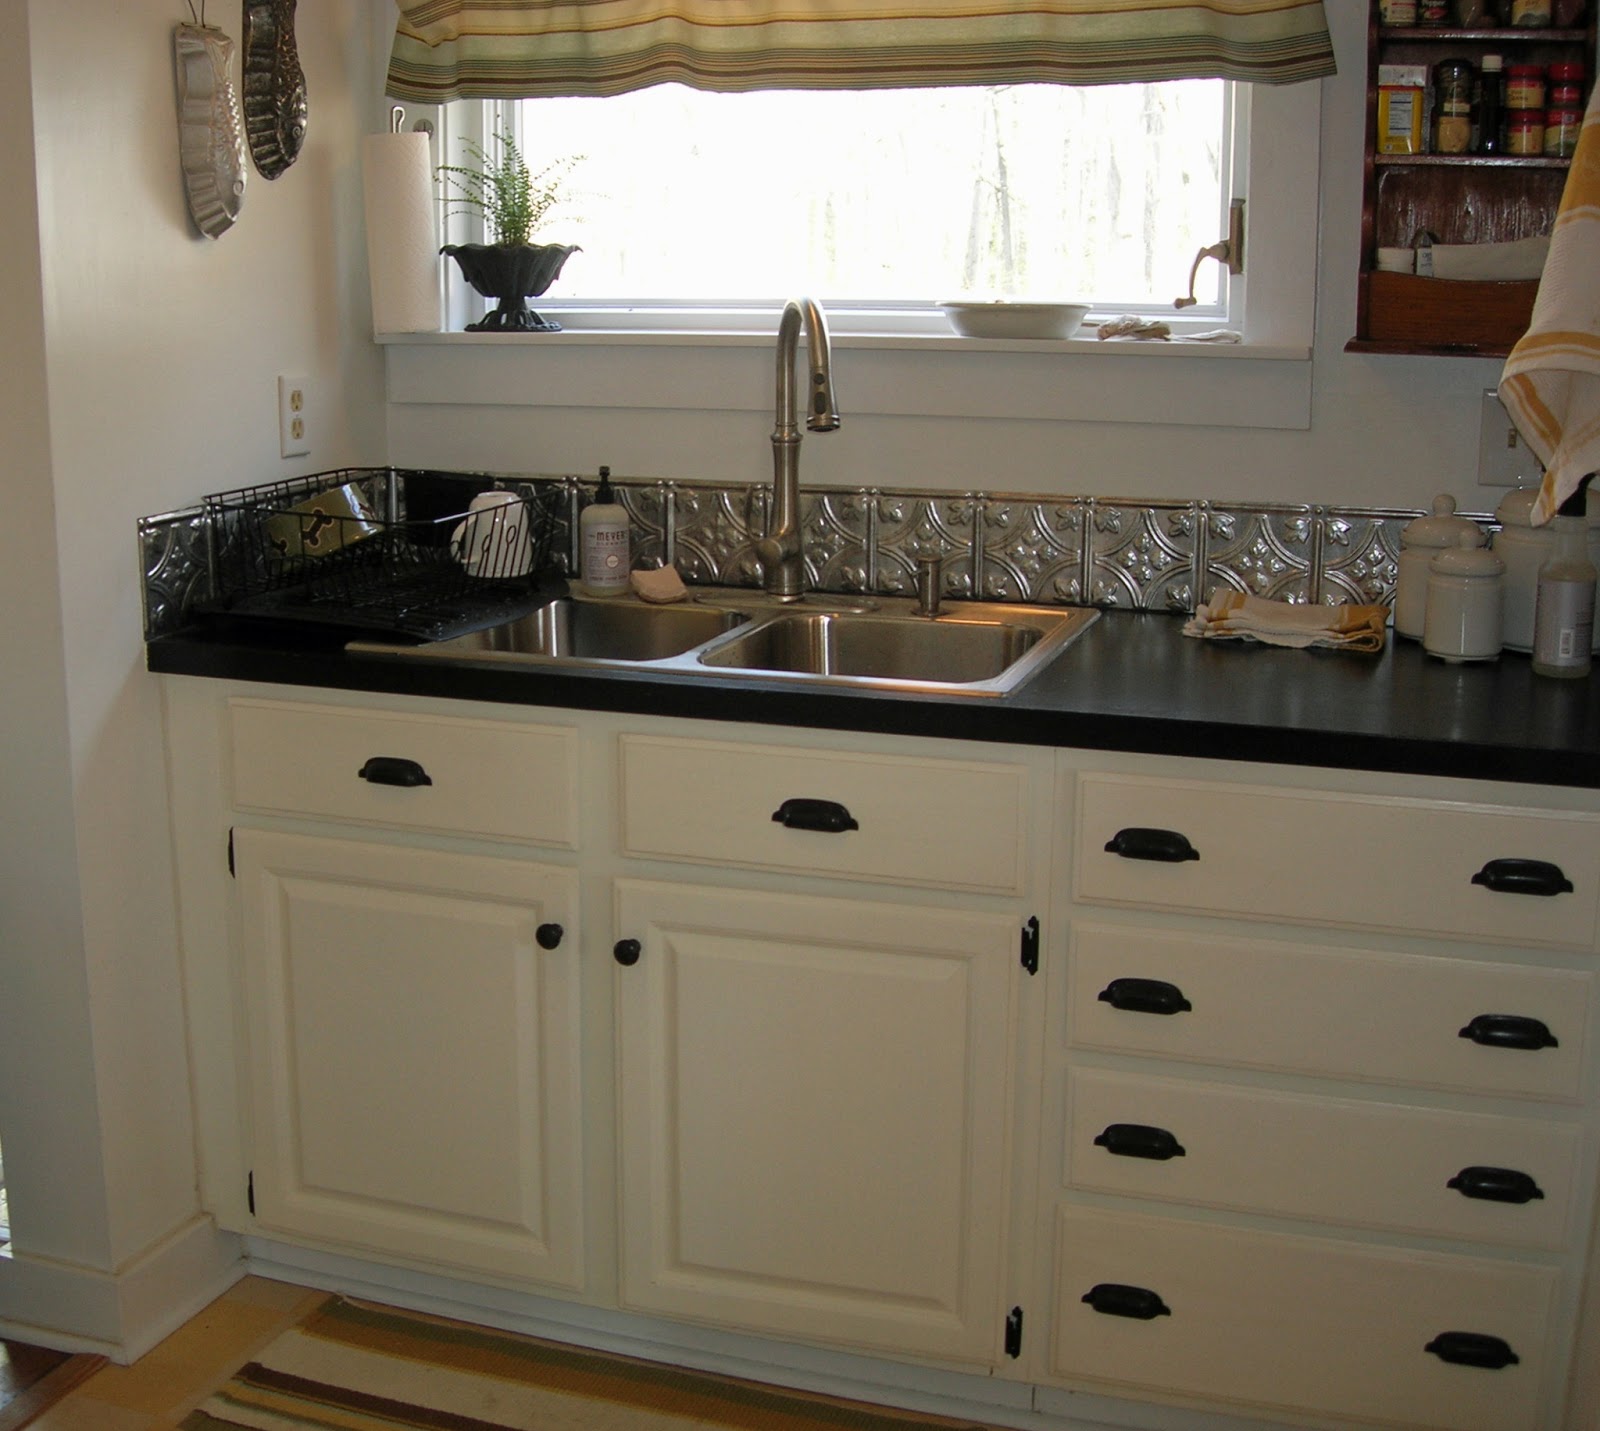
  • Contractor removed the cabinets above the sink, and I replaced them with open shelving, which is reclaimed wood;
  • I got a new farmhouse sink, which was able to be retrofitted into the existing cabinets (love Kohler!);
  • I painted all the cabinets with Annie Sloan chalk paint* and replaced the handles;
  • I installed a tile back splash, using subway tile I had left over from my city condo bathroom, in a herringbone pattern;
  • Contractor removed the large, corner floor cabinets, and I put up a wire shelving unit from the Container Store in its place;
  • I replaced the baseboard in that corner to match the trim I found when I ripped out the existing trim in that area;
  • Countertop place installed beautiful soapstone counters to replace fake granite;
  • I got a new stove and dishwasher; and
  • I painted the previously flesh-toned walls white.
* While the existing cabinets were in good shape, there was way too much wood going on between all of the wood floors and the exposed log walls in the adjoining dining room, especially with all of the different wood surfaces being different colors.  

I have some things left to finish (e.g., replace the trim in the rest of the kitchen, paint the ceiling, and finish painting the walls in the refrigerator corner), but the bulk of the work is done.  I should probably tally up the total cost at some point, but I will save that for another day.

One nice thing about doing things on my own - hiring out some of the work, as needed - is that I was able to make design decisions "organically," with each decision flowing from the next, naturally, instead of having to make all of my decisions up front.   

Check back for more posts about my year of progress.  I sum it up as 7/8 of the rooms in my house are 3/4 of the way done!

In the Middle


Today is my four-month anniversary of moving into my new (very old) house in a wonderful small town.  

I honestly thought I'd be blogging with progress reports as I went along, but, as it turns out, I guess I don't like showing people what things look like in the Middle - in other words, in between the Before and the After.  Right now, everything is in the Middle.

When I start having really good Before and Afters to show, I'll be back!! And they will be good, I promise! 
 

The Blue House


Yes, I know, I've been bad about posting.  But I have a good excuse.  I sold my city home last month and moved into this adorable house in a small town.  

After almost 7 years of having the best of both worlds - weekdays in the city and weekends in the country - I decided to simplify and "consolidate" my life by moving to a small town that is commuting distance to D.C.  I feel like I'm finally home.

This house is so special.  The left half of the house was built in the 1700's as a one-and-a-half story log cabin.  In the 1800's, they raised it to two stories, built on the right half, and added the siding.  The well is the original well for the town, where people used to water their horses. 

One of the coolest things about the house is that inside, in a few rooms, the log walls are exposed.  Here is a photo of the dining room that I took when I first saw the house.


I have many projects in my future, but it's mostly fun stuff.  The house is in great shape, and I look at it as I'm just taking it over the finish line.

Fiona loves it here.  One of her favorite things is that there is a front and a back staircase, which is perfect for games of "I have something I'm not supposed to have - try and catch me!!" 

Country Home Before and After

Here are some before and after interior pictures of my country home.  I've tried to use pictures taken from the same angle to make the comparison easier. 

These pictures represent a little over 6 years of effort, but only on the weekends, because I'm in the city during the week.  
Bottom of Stairs


Living Room


Dining Room


Kitchen


Powder Room
 
 Top of Stairs


 Master Bedroom 

 
Green Bedroom


Flower Bedroom


Full Bathroom 


That's it for now!  Hope you enjoyed.  I think the most dramatic comparison is the second set of kitchen photos.  What do you think?

For the full house tour with additional photos, see my Country Home page.  

Hanging a Colorful Quilt in My City Living Room


Three years ago, I went on an amazing trip to Guatemala with the Habitat for Humanity Global Village program.  Our last day there was spent in Antigua, where I bought this beautiful, handmade quilt.  It's huge, at 84" by 96".  It's been in a closet since I got back from the trip.  Sometimes used as guest bedding, but, for the most part, just sitting on a shelf, which is pretty sad for such a beautiful thing with so much sentimental value.

I participated in Apartment Therapy's January Cure this year (so worth it!!), and when we came to the "Hanging Artwork" assignment, I decided it would be a good time to hang the quilt.  I'm a month late, but that's ok.

What once was a boring, blank wall ...


... is now a colorful, happy reminder of an incredible trip.  


And it really does show that with the right planning, the correct tools, and a good ladder, a job that might look like it requires two people can be fairly easily tackled by one, smallish woman.


The first step was to sew a "quilt sleeve" for the back of the quilt.  There are plenty of tutorials from real quilt people out there (here is one of the ones I used), so I won't bore you with the details, but it's basically a tube of fabric (I used some scrap Ikea curtain fabric) sewed to the back of the quilt.


The trick is to make it with a little slack so that your quilt won't bulge when you hang it.  You can sew the sleeve on a sewing machine, but you have to hand-stich the sleeve onto the back of the quilt, so that it doesn't show from the front.


You also need a rod of some sort to hang the quilt on.  I used a piece of pine 1-1/4" x 6/16" molding.  (You can see it sitting on the table in the "boring wall" photo above.)  Once you have cut the molding or whatever you're using to the correct size, you need to attach screw eyes to both ends.


You then want to take your molding with the screw eyes and measure and attach it to the wall without the quilt on it.  The reason for doing this is to check for level before you go to the trouble of hanging the quilt, which is heavier and therefore harder to hang than just the light molding.  For now, I have hung it with medium-sized nails with a large head.  As soon as I'm ready to commit to a bigger hole in the wall, I plan to go back and replace the nails with sturdier, self-drilling drywall anchors and screws.

Once you're happy with the molding, take it down off the wall and put it through the sleeve.  Make sure that you have the molding in the exact same orientation (left, right, front, back) as when you had it on the wall, as it could be bowed (like mine was), and using it in another orientation might change how level it is.  

I was lucky to have a sturdy table that I could carefully walk on and use as a sort of platform.  I was able to hang the one end of the quilt, then, holding the other end, shimmy across the glass table to hang the other end.  I used a ladder when I was measuring and nailing in the nails, but the table was easier for hanging.   

I chose to hang the quilt so that the bottom just skims the top of the baseboard molding.  And I centered it above the table.  
A few more angles:


It makes the room feel so much warmer and makes the table a more inviting place.